As a firmware interface standard to replace BIOS (Basic Input/Output System), UEFI (Unified Extensible Firmware Interface) specification has been a collective effort by UEFI Forum members for a while. UEFI is in essence an abstraction layer between firmware and OS, and independent of device hardware and architecture. Which provides flexibility for supporting multiple and various OS environments and as well acts as a generic target boot environment of drivers for cross-platform compatibility, as opposed to the need to develop a particular driver for particular hardware. With UEFI, there are also security opportunities to better defend a class of malware like bootkit and rootkit targeting the pre-boot environment of a device.
Why UEFI Secure Boot
Specifically, UEFI Secure Boot is an option to prevent a device from being tampered in a pre-boot environment, i.e. the period from power-on to initializing the OS. Malware injects itself in firmware or ROM, gains hardware access and is loaded before the OS, etc. make it difficult to defend or clean up, once a device is compromised. The Secure Boot option performs signature authentication upon executing code during pre-boot. A code/firmware creator is in this case required to digitally sign one’s code with a private key and to be verified against the paired public key upon loading at a device startup. Apparently, this process demands a signature database of supported hardware vendors established beforehand. Which explains why Microsoft, in fact since Windows 8, has instituted a driver signing process for certifying digital signatures of firmware for implementing UEFI Secure Boot and there are some changes of the process in Windows 10.
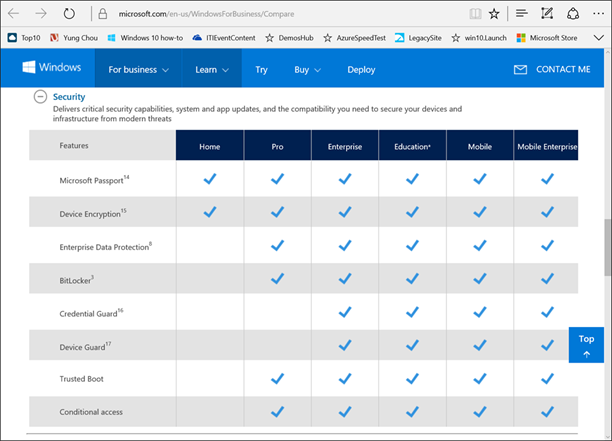
Above all, UEFI Secure Boot specification addresses security issues relevant to boot time exploits and eliminates the possibility for executing untrusted or altered code during pre-boot. And Windows 10 Enterprise supports UEFI 2.3.1 and later for Device Guard, a new and key security feature of Windows 10 Enterprise to ensure hardware and OS boot integrity of corporate devices. The following compares the security features of Windows 10 editions. Additional information of comparing Windows 10 editions based on Core Experience and Business Experience is readily available.
Sample Disk Layouts
One easy way for an end user to verify if a device is UEFI-based is to examine the disk layout. Typically a BIOS-based device has two partitions, system and OS, on a primary disk where the OS is installed. A device based on UEFI has a vividly different disk layout from that of BIOS. The following details. The following are sample disk layouts of Windows 10 devices based on BIOS and UEFI as reported by Disk Manager and DISKPART command line utility.
Then BIOS
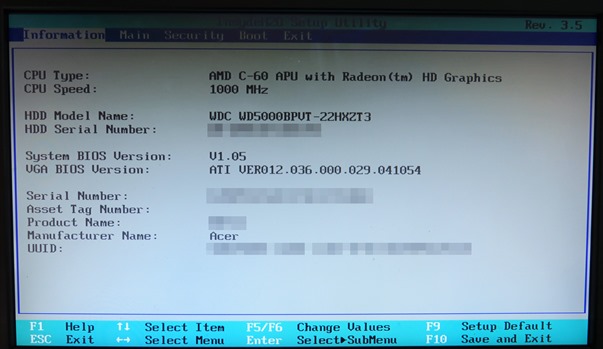
This is a sample BIOS setup screen of a Windows device.
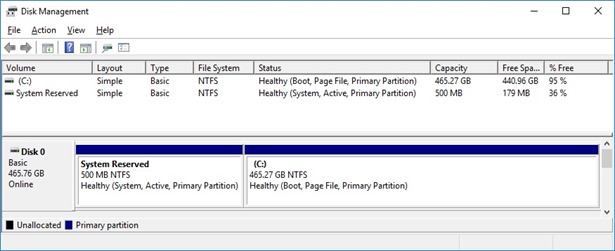
And this is a typical disk layout of a device with BIOS, with System and an OS partitions, as reported by Windows desktop Disk Manager.
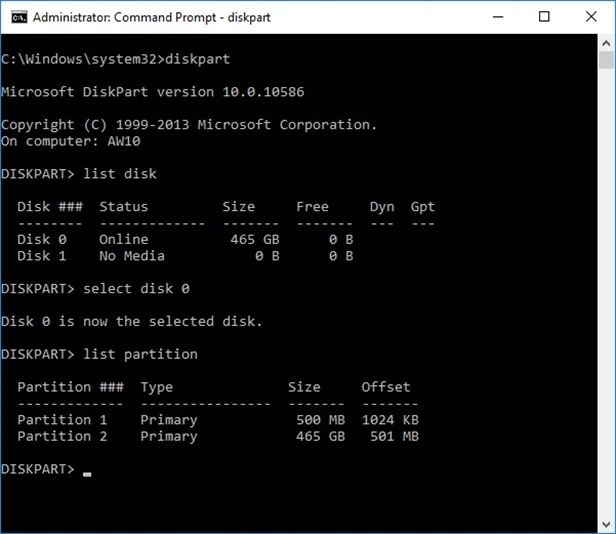
A DISKPART session as demonstrated below shows a disk layout consistent with what is reported by Disk Manager, with two partitions accordingly.
Now with UEFI
For UEFI, the following are two sample disk layouts. Notice that either one has an EFI System Partition, i.e. ESP. However, a DISKPART session reveals that there is actually an extra partition, the so-called Microsoft Reserved Partition, or MSR, which is:
- With no partition ID and not reported by Disk Manager
- Not for storing any user data
- Reserved for drive management of the local hard disk
The sizes of ESP and MSR are customizable. And based on business needs, additional partitions are to be added. Those involved in OS imaging and enterprise device deployment are encouraged to review and get familiar with the specifics of and Microsoft’s recommendations on configuring UEFI/GPT-based hard drive partitions, as detailed elsewhere.
Sample 1, A Typical Disk Layout with UEFI
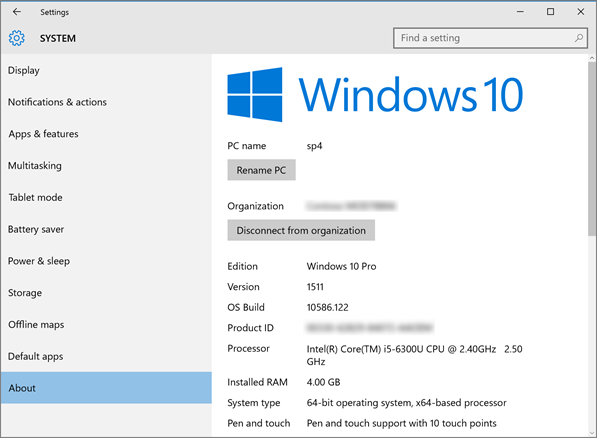
This is based on a Surface Pro 4 machine purchased from a retail store running Windows 10 Pro Build 10586, as shown.
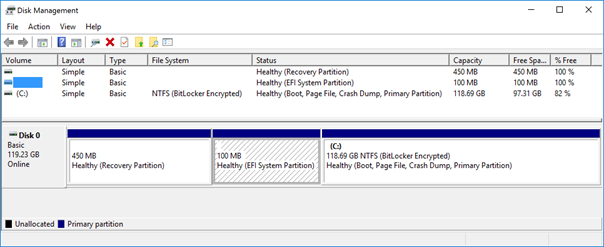
Disk Manager shows a three-partition disk with an ESP of 100 MB in size.
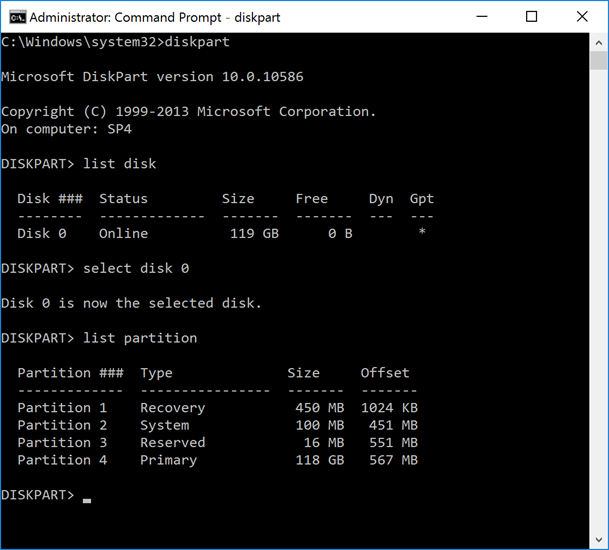
On the same device, a DISKPART session reveals that the disk also has a 16-MB MSR as Partition 3.
Sample 2, A Custom Disk Layout with UEFI
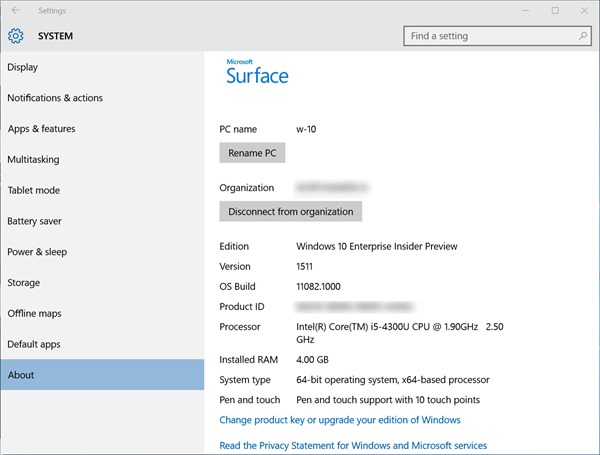
Below is a sample company-issued Surface Pro 3 device running Windows 10 Enterprise Insider Preview Build 11082.
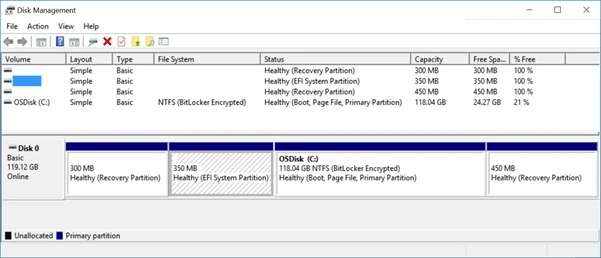
Here, Disk Manager presents a custom image with four partitions including a 350 MB ESP and a recovery partition after the OS partition.
And again, a DISKPART session reveals an 128 MB MSR as Partition 3.
UEFI and GPT
One thing worth point out is that when deploying Windows to an UEFI-based PC, one must format the hard drive that includes the Windows partition as a GUID Partition Table (GPT) file system. Additional drives may then use either the GPT or Master Boot Record (MBR) file format.
Manually Enabling Secure Boot
With UEFI already configured, here are manually ways to enable/configure secure boot with a Windows 10 device.
A Hardware Short-Cut with Surface Pro devices
There is a convenient way via hardware to change the boot settings of a Microsoft Surface Pro device. While the machine is power off, pressing the power button and the volume up button at the same time for a few (generally 5 to 10, some may take 20 or more) seconds will bring up the device boot setting screen. And if keeping holding the power and volume up buttons passing the boot setup screen for another few seconds, eventually this will trigger reloading the firmware in my experience.
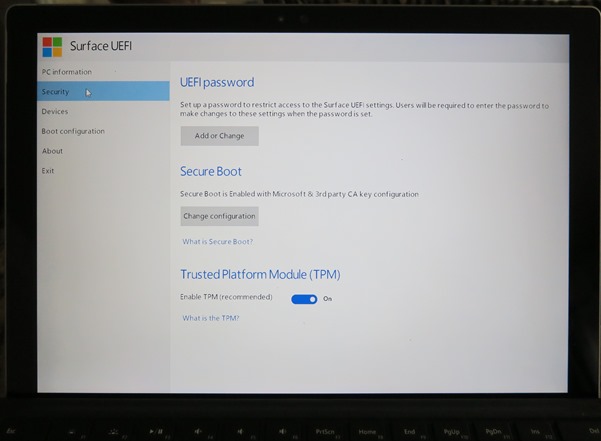
Here is the boot setup screen from the above mentioned Surface Pro 4 device running Windows 10 Pro, purchased from a retail store.
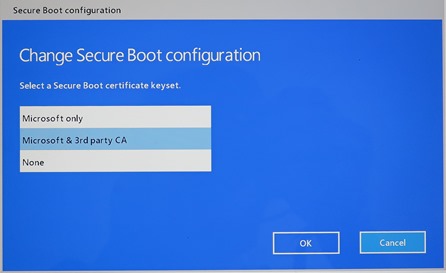
and with the secure boot options:
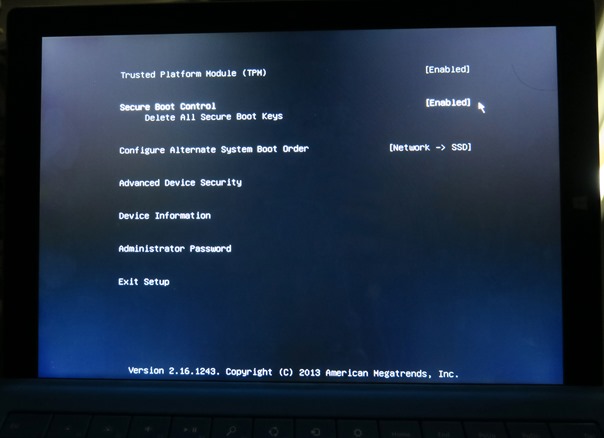
On the other hand, the following is a boot setup screen from a sample company-issued Surface Pro 3 device with a custom image built deployed with System Center Configuration Manager. The UI may appear different, and the available settings are most the same.
Changing UEFI or Boot Settings via UI
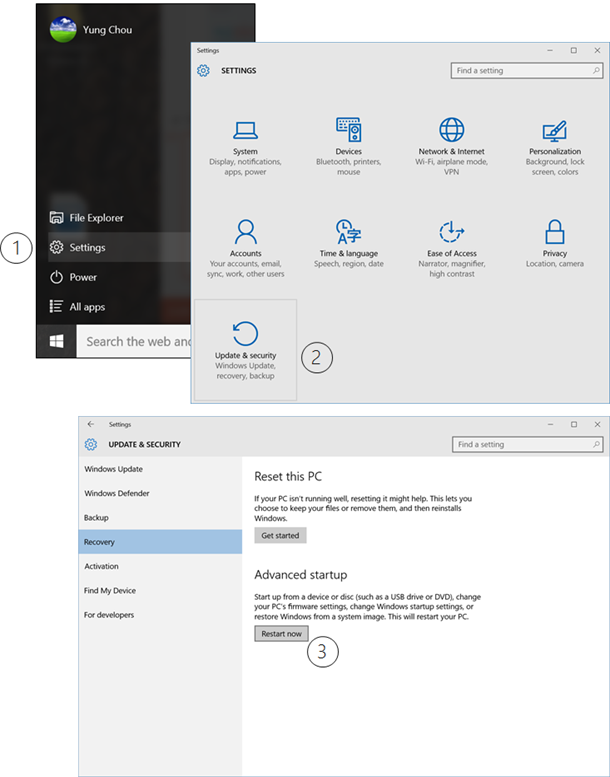
For a Windows 10 device based on UEFI, here is a visual presentation for demonstrating how to manually enable UEFI Secure Boot on Surface Pro 3 device running Windows 10 Enterprise Insider Preview Build 11082. The process begins by clicking Start/Settings from the desktop.
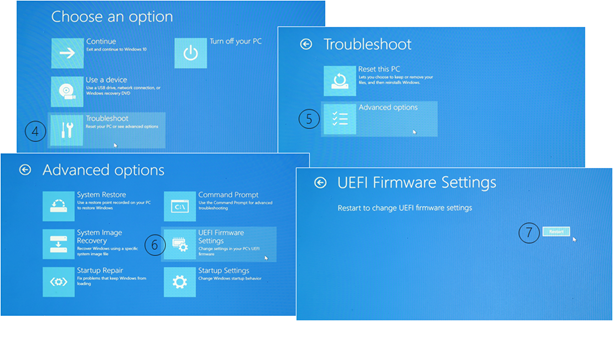
Upon the first restart, click the following screens as indicated.
And the second restart should bring up the boot setup screen shown earlier in this article. And again as mentioned, the process via UI can be short-cut by pressing the power and the volume up button at the same time for a few seconds, while a Surface Pro device is powered off.
Closing Thoughts
With on-going malware threats and a growing trend in adopting BYOD, IT must recognize the urgency to fundamentally secure corporate devices from power on to off. UEFI Secure Boot is an industry standard and a mechanism to ensure hardware integrity every time and all the time. There are specific hardware requirements and configurations must be first put in place for solutions relying on UEFI Secure Boot like Device Guard for Windows 10 Enterprise. Therefore, rolling out UEFI 2.3.1 or later and TPM 2.0 as well are important hardware components for IT to leverage hardware-based security features to fundamentally secure corporate devices.


Pingback: Windows 10 Secure Boot information | Firmware Security
Pingback: An Introduction of UEFI Secure Boot in Windows ...
Pingback: Weekend Reading – March 4, 2016 | Healey.io
Pingback: An Introduction of Windows 10 Credential Guard | yungchou